

Slide Master PowerPoint: how often do you receive slides from colleagues and waste entire days formatting them together in the hope of making your presentation continuity acceptable?
How many times have you decided to leave the presentation as it was because you had no time? Have you presented that awful collage to a wincing audience? How many times have you tried to reduce the size of a powerpoint slide presentation, unable to figure out why it was so heavy?
How many times have you tried to align titles from one slide to another, flicking back and forth?
I created Microsoft PowerPoint Slide Master tutorial for you to solve these problems!
I believe it’s time to discover my magic tutorial.
The Slide Master PowerPoint tutorial focuses on Slide master which is probably the most powerful and flexible tool in PowerPoint.
It’s extremely easy to use and quick to learn.
The Slide Master has the power to save you hours of work that would otherwise be spent formatting and reformatting your slides.
However, if misunderstood or ignored, it will often cause a dramatic waste of time.
What is slide master and why is it so important?
Microsoft’s definition for the Slide Master is:
Master slides control the look of your entire presentation, including, fonts, background, effects, and just about everything else. You can insert a shape or a logo on a slide master, for example, and it will show up on all your slides automatically.
PowerPoint tutorial Slide Master explanation
Slide Master is a powerful tool that enables you to manage the layout of an effective PowerPoint presentation.
Every time you create new slide in your presentation, you can assign it a specific layout.
Imagine the Slide Master like a bottom layer underneath your slide.
It contains all the information about the layout of your slides, ready for you to add your information.
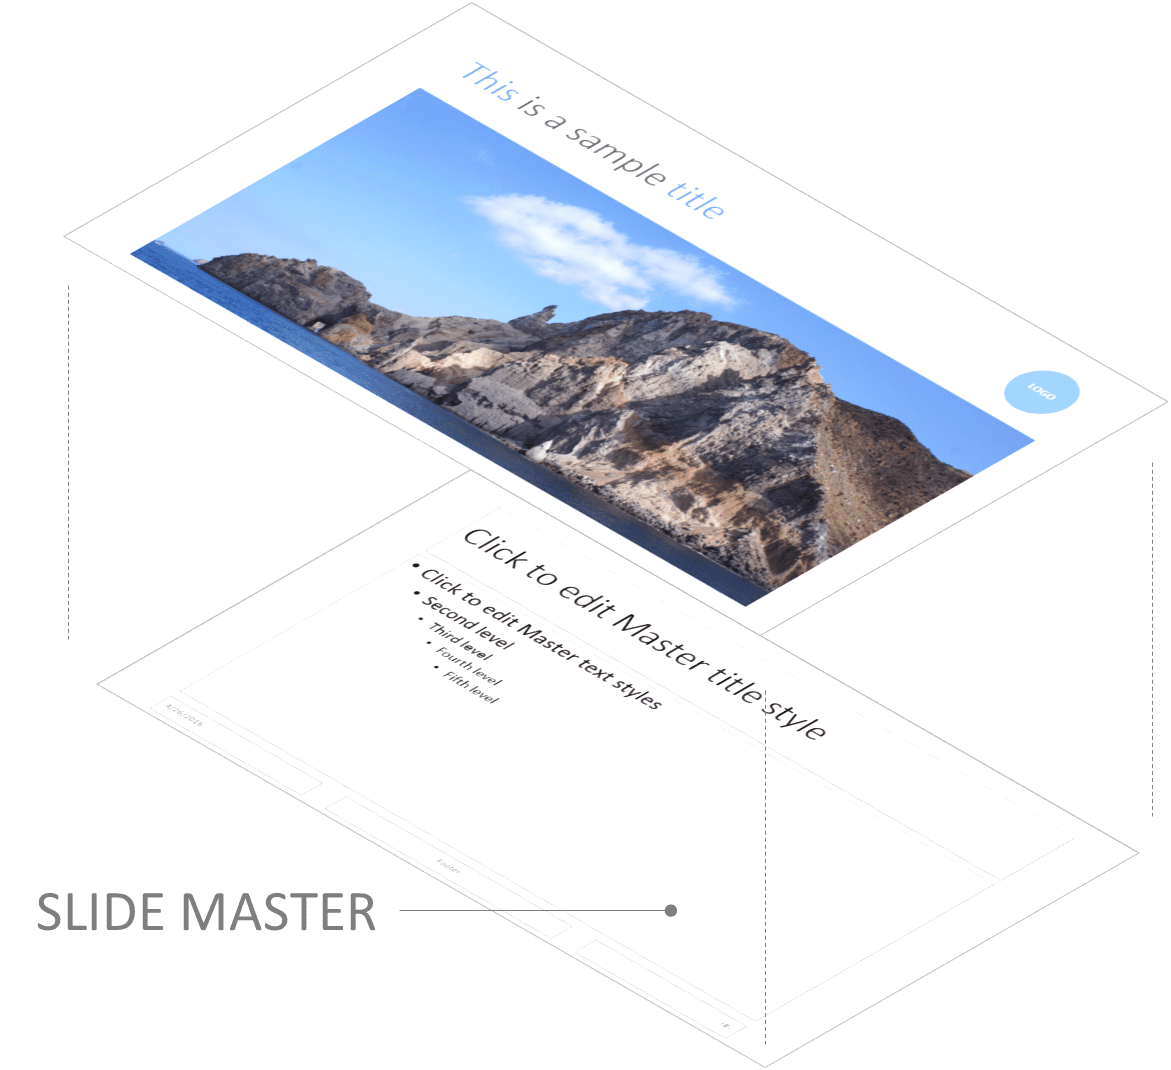
A Slide Master is made from the layouts used within a presentation. As you can imagine, this enables you to create unicity amongst your slides.
For example, you will have all the titles in the same position, with no need to recreate and reposition them on each slide.
After all, it would be a great waste of time and you will really struggle to get the same position from slide to slide.
The PowerPoint Slide Master takes care of that very efficiently. And if you need to make a quick edit on the presentation when nearly complete, you can quickly do so through the slide master.
Let’s suppose you finish your presentation, you deliver it to your boss and he tells you that he desires the titles to be a smaller font size and a specific color.
If you go slide by slide, it can take a very long time. But if all the slides are linked to a layout in the slide master, you’ll just need to edit the layout slide once and the changes will automatically be applied to all your slides.
In order to apply one of the layouts to the active slide, right-click on the slide thumbnail “select layout”, and you’ll be able to select the layout to apply.

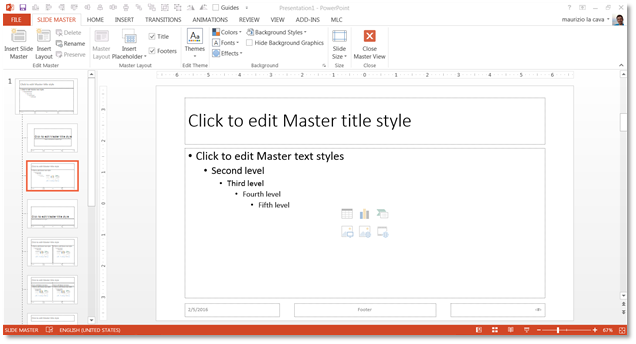
To open the Slide Master, click on “View” and then “Slide Master”.

In any new PowerPoint presentation, you’ll get a set of standard layouts preset in the standard Microsoft PowerPoint Slide Master.
Remember, in order to close the slide master and go back to normal view, you need to click on Close Master View in the Slide Master tab.

The magic comes when you edit the Slide Master and customize it to your needs. Let’s see how it works.
First, you’ll notice that the slides are not all the same; there is a hierarchy between them.

On the very top, you’ll find the theme slide; it includes all the features to be applied to every layout. Every theme slide may group multiple layouts.
The layouts inherit the formatting from the theme slide. When you edit other presentations, you’ll find many themes in the Slide Master.
Some of them will look so old that they will reveal how long that presentation has been shared and reused without taking care of keeping the Slide Master clean.
Therefore, PowerPoint allows you to have multiple themes within the same Slide Master, but I do not see why you would need to have multiple themes within the same presentation.
My advice is to always keep just one theme and to include all the layouts you need in it.
Slide Master: applying fonts with Microsoft PowerPoint.
Have you ever struggled applying the font to all the slides of your presentation?
Do you remember the last time you found yourself checking all the slides to make sure the font is the one you chose, and not some standard font that PowerPoint applies to every new slide?
When you create a new slide in PowerPoint, it automatically applies a layout and the layout takes formatting from the theme.
Therefore, if you want to apply a font to your presentation and be sure it won’t change every time you create a new slide, apply the font to the theme and PowerPoint will replicate this to all layouts.
Let’s see how it works:
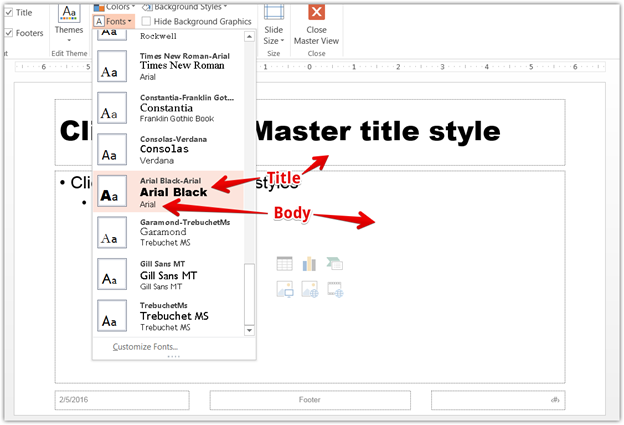
First, you need to select the theme slide, then select the Font menu in the Slide Master menu and you’ll be able to apply a font combination to the theme.
As you can see, PowerPoint gives you the opportunity to choose a combination of fonts: one for the title and one for the body.
Learn how to properly choose the most effective font combination for every presentation in the Lean Presentation Design book.
Slide Master: applying color combinations
You can apply the same method to other formatting options; for example, colors.
You’ll get many ready-to-use color combinations.

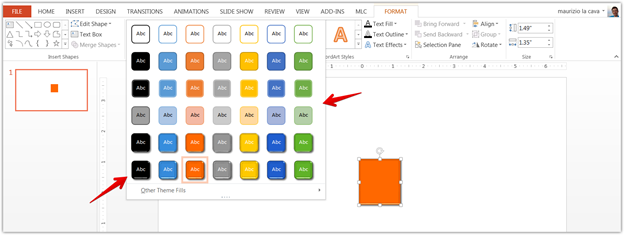
Once selected, close the Slide Master, go back to the Normal view and create a simple shape to see what happened to the color palette.
As you can see, the standard color palette has changed to allow you quickly select colors from the palette applied to the main theme.

Color combinations are one of the most powerful tools you can use to boost your communication effectiveness.
However, building a color palette requires design skills.
If you do not use specific techniques, you risk creating a negative impact on your communication.
Applying effects to the PowerPoint Slide Master
From the theme slide, you can also control the effects applicable to shapes.

After you set them up in the Slide Master, you’ll find the effects available in the Normal view.
Insert a new shape, open the Format tab of the shape, and then the ready-to-use effect panel.
Even if this panel is very effective, I never really use it in my presentations.
The effect panel gives you the possibility to create several forms of 3D effects, which I recommend not to use in your presentations.
Slide master: edit PowerPoint slide master background image
If you want to quickly apply a background to the slides, you can easily choose it the background styles panels.

How to insert editable placeholders in the Slide Master
You surely noticed that every time you apply a layout to a slide, it comes with placeholders like editable text boxes.
These text boxes aren’t standard ones because they are placed in a layout and can be edited from the normal view.
This mechanism allows you to leverage the power of the Slide Master.
There are several types of PowerPoint slide master editable text boxes you can apply to a layout.
The most important ones are the title and the footers. You can quickly select them from the top menu with a check box.
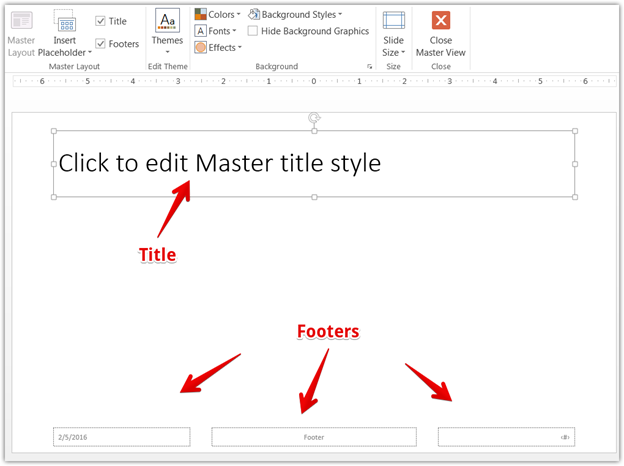
Date, footer description and page number are all part of the bottom page placeholders.
Once the placeholders are placed in the slide, you can format them as you prefer. You can choose among several type of placeholders.

Slide Master > Placeholders > Text
Creates a text box with a pre-formatted bullet point up to five level of indentation.
The text box shows six icons in the middle that let you choose the kind of content you can insert from the Normal view.
This is the most complete placeholder.
All the others are single parts of this one.

Slide Master > Placeholders >Picture
Creates a box to quickly add an image.

Slide Master > Placeholders > Chart
Creates a box to quickly insert a chart.

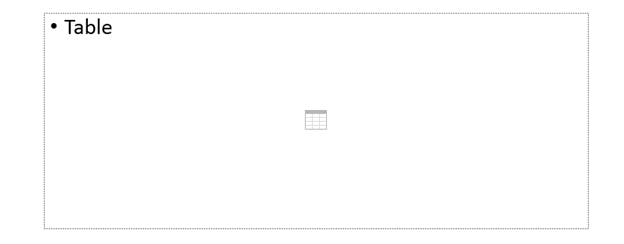
Slide Master > Placeholders > Table
Allows you to quickly insert a table.
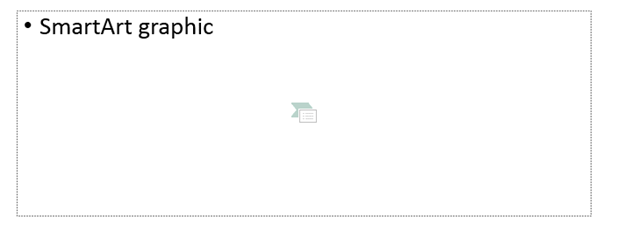
Slide Master > Placeholders > Smart Art
Placeholder for the PowerPoint Smart Arts. I never use Smart Arts, and neither should you!
Slide Master > Placeholders > Media
Perfect for inserting videos.

Slide Master > Placeholders > Online Image
You can even add a placeholder to facilitate inserting images from the web.

Thanks to all these placeholders, you can create complex and accurate layouts.
You can even add multiple PowerPoint Slide Master editable text boxes on the same slide.
All these functions are very useful when you need to set up layouts to be filled by others.
A typical case is when you need to collect the same slide from separate people (eg. Slide with the monthly performance report from different geographies compiled by the business units in the country).
You could easily set up a layout to share with all the business units.
They will update their charts, their tables, the title and a nice video where they can comment the figures.
You’ll only need to collect the slides and put them together in the same presentation and they’ll all come nicely formatted in the same way.

Cleaning up PowerPoint Slide Master
When you jump on somebody else’s presentation, you’ll find that the master is often a mess.
There are many themes with redundant layouts and many others that have been in the document since it was created and aren’t used anymore.
This is not effective because you will get lost among the layouts every time you try to apply one to the slides and it also wastes a lot of space, making the presentation very heavy.
In these cases, I recommend you clean up the Slide Master from the unused or redundant themes, and use one main theme with only the layouts you really use in the presentation.
When you start cleaning your Slide Master, you’ll notice that some layouts cannot be canceled. This happens because those layouts are in use by a slide in the presentation.
If you go over the layout previews with your pointer, PowerPoint will tell you which slide is using it, so you’ll be able to quickly find the slide and unlink it from that layout just applying another layout.

PowerPoint master slide templates
Microsoft developed many PowerPoint Slide Master templates you can download for free.

I strongly recommend you avoid falling into the trap of the ready-to-use PowerPoint master slide templates.
The master slide is crucial to unleash your creativity and clean up your presentation.
If you use ready-to-use master slide templates, you’ll force yourself to stick to old-fashioned designs and you’ll get an ineffective presentation.
I prefer to create a new presentation, to clean up the default Slide Master template and to keep it simple and clean.
I often keep only the layouts I really need and I create new designs as I require them.
Slide Master makes your presentation flexible
I always use the PowerPoint Slide Master to deliver my clients the flexibility to edit and upgrade the presentations I create for them in the future.
Every time I create a new presentation, the first thing I do is format the Slide Master to set formatting options and create the layouts I’ll need.
My clients always receive their presentation with the customized Slide Master I create for them so they can add new slides, applying the same formatting combination properties I created for them.
So, as seen in this Microsoft PowerPoint Slide Master tutorial, if you right-click on the slide thumbnail and check the layout panel, you can choose one of the layouts from the Slide Master.

For example, let’s say you need to make section divider slides.
First, you choose one of the layouts. In this case, I’ll select the third one.

You get the slide ready.

Another step of my Microsoft PowerPoint Slide master Tutorial is to add the section number and the section title you prefer.
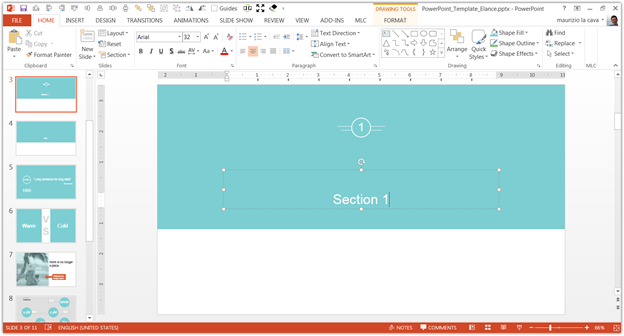
The beauty here is that every time you’ll add a section splitter slide, you will just need to recall the same layout and to change the two text fields.
You won’t need to align the background green rectangle and the different placeholders.
Finally, all the slides will look the same and you’ll get consistency through your presentation.
Name layouts properly
In my experience, clients require me to craft a ready-to-use set of layouts to unify all their corporate presentations.
A typical example is the internal communication function that wants to standardize the presentations within the company.
This is very important because it creates unicity internally and also when the corporate presentations are sent to clients.
In these cases, the Slide master presentation becomes the official theme of the company and, after I deliver it, it is often shared with all the employees.
Since there won’t be any explanation attached, it might be very useful to name the layouts properly.
In the following image of the Microsoft PowerPoint Slide Master tutorial, you’ll see how I named the 9 layouts I developed for one of my clients.

When you choose names for the layouts, it’s always important to agree on them with your client, in order to be sure that they will be meaningful, and therefore of help to those who will need to use them.
To name a layout in the Slide Master, you need to right-click on the layout you want to edit:
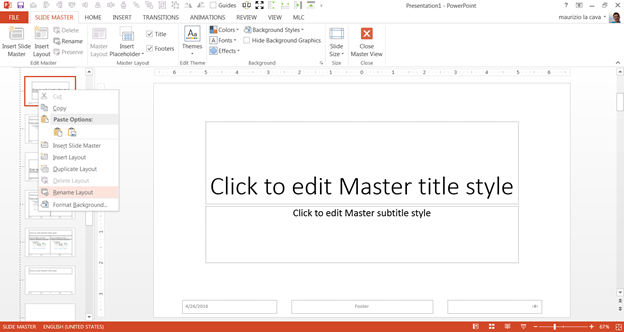
The final step of my Microsoft PowerPoint Slide Master tutorial is to Rename the layout and type the name you chose.

PowerPoint Slide Master: Conclusion
In this Microsoft PowerPoint Slide Master tutorial, we saw that the Slide Master is probably the most powerful tool you can leverage to reduce the time spent formatting your slides.
It might take more time in the beginning because you won’t go straight away to work on the presentation, but you’ll dedicate some time to set it up, but trust me, you’ll be grateful the whole time you’re doing your presentation.
How do you use the Slide Master? Should you have any further curiosity about my Microsoft PowerPoint slide master tutorial do not hesitate to comment on this post and share it with me.
I’ll be glad to contribute.
Key Takeaways
Streamline Formatting: The Slide Master tool in PowerPoint allows you to maintain consistency across your entire presentation by controlling the fonts, backgrounds, effects, and other design elements globally. This eliminates the need to format individual slides manually.
Time-Saving Efficiency: By setting up your Slide Master at the beginning, you save significant time in the long run, especially when it comes to making global changes. A single edit in the Slide Master can update all related slides instantly.
Ensure Design Consistency: The Slide Master ensures all slides in your presentation have a uniform look and feel, which is crucial for maintaining a professional appearance. This includes consistent placement of titles, logos, and other recurring elements.
Reduce File Size: Cleaning up unused or redundant layouts in the Slide Master can help reduce the overall file size of your presentation, making it easier to share and work with.
Simplify Future Edits: If changes are needed after the presentation is nearly complete, editing the Slide Master allows you to make those changes quickly and uniformly, without having to go slide by slide.
Apply Global Formatting: The Slide Master enables you to apply global settings such as font types, color schemes, and effects. This ensures that all new slides will automatically adopt these settings, reducing the need for manual adjustments.
Customizable Layouts: You can create custom layouts within the Slide Master, tailored to your specific needs. These layouts can be reused throughout the presentation, ensuring consistency and saving time on slide creation.
Efficient Collaboration: By setting up a Slide Master, you can easily share a standard template with colleagues. This makes collaboration more efficient, as everyone can work within the same framework, ensuring consistency across different contributions.
Avoid Outdated Designs: Using a clean and updated Slide Master helps avoid the pitfall of relying on outdated design elements. This keeps your presentations looking modern and professional.
Flexibility in Presentation Design: The Slide Master offers the flexibility to create and edit layouts that can be reused in future presentations, making it a powerful tool for maintaining brand consistency across multiple presentations.
FAQs
What is Slide Master and why is it so important?
Slide Master is a powerful tool in Microsoft PowerPoint that enables you to manage the layout of your presentation. It controls the look of your entire presentation, including fonts, backgrounds, and effects. By using Slide Master, you can ensure consistency across all slides, making it easier to format and edit your presentation efficiently.
How can the Slide Master save me time when creating a PowerPoint presentation?
The Slide Master can save you hours of work by allowing you to set up a consistent layout for your entire presentation. Instead of formatting each slide individually, you can make changes to the Slide Master, and those changes will automatically apply to all slides linked to it. This is especially useful for making quick edits, like changing font sizes or colors, across multiple slides.
How do I apply a layout from the Slide Master to a slide?
To apply a layout from the Slide Master to a slide, right-click on the slide thumbnail in the slide pane, select “Layout,” and then choose the layout you want to apply from the list. This allows you to maintain a consistent design throughout your presentation.
How do I open and close the Slide Master in PowerPoint?
To open the Slide Master in PowerPoint, click on “View” in the top menu and then select “Slide Master.” To close the Slide Master and return to normal view, click on “Close Master View” in the Slide Master tab.
What are placeholders in the Slide Master and how can they be used?
Placeholders in the Slide Master are pre-formatted areas on a layout that can hold text, images, charts, tables, or other content. They help you maintain consistency in the placement and formatting of elements across your slides. You can insert different types of placeholders, such as text boxes, image boxes, or chart boxes, depending on your needs.
DON’T HAVE TIME TO READ THE ARTICLE? DON’T WORRY, LET ME SEND YOU A COPY
Comments on Slide Master PowerPoint: the Complete Guide to make the best use of it
Amit Farkade
Thanks for this post.It’s a helpful information for powerpoint slide design.
powerpointgeek
Farah Rizk
Very comprehensive tutorial! Thank you 🙂
Jessica Lee
I deliberately needed to make a presentation and finally found the blog that can guide me through it.
rohit aggarwal
thanks for the information
Lauren Contalonis
When copying old slides into a new template, usually these slides bring in their old layouts nested under the “native” slide master. Do you have any tips/tricks to have the old slides with old layouts adopt the new slide layouts native to the template? If not, do you recommend having the user go through every slide, check to see if the slide layout is native to the template, and then manually change from the old layout to one of the layouts native to the template (and then finally go to the slide master and then delete those old/bad layouts)?
info
In Office 365, when you open a presentation that has 25 or more slide masters and some of them are unused, PowerPoint opens a message box offering to remove the unused slide masters for you. You can accept or decline. You may want to simply know about the unused masters so that you can manually review them yourself at a later time.
Nuzhath
Hi
How do I get a list of slides and the master slides that have been applied.
If you hover on a master slide, a message pops up – used by slide 2,… etc. But I dont know if the … indicates there are more slides.
Regards,
Nuzhath
Maurizio La Cava
the dots indicate that it is applied to other slides you can’t have a complete list as far as I know
Steve
Excellent overview & tutorial on practical use of SlideMaster. Thank You!